 Why tuck?
This is a simple technique you can use to help your baby into this recommended ergonomic carrying position. While this is easier in some carriers, you can still achieve it with the majority of carriers.
Even if you are using a carrier described as ergonomic, we still recommend that you do this quick step to help your baby be as comfortable as possible and ensure their hip joints are supported. That is, it's quite possible to plonk your baby into the most expensive ergonomic carrier but if you don't check you are carrying baby in a good position, they may still be quite uncomfortable.
If you are using a narrow-based basic carrier, you will likely need to also add a scarf to keep your baby's hips in the healthy position - see our separate info on this topic.
When you really need a tuck!
If your baby's spine is straight, the tuck will help your baby's spine into the natural gently curved shape.
Also take a look at your baby's legs. If their legs are hanging straight down, this is a clear sign your baby is not supported sufficiently.
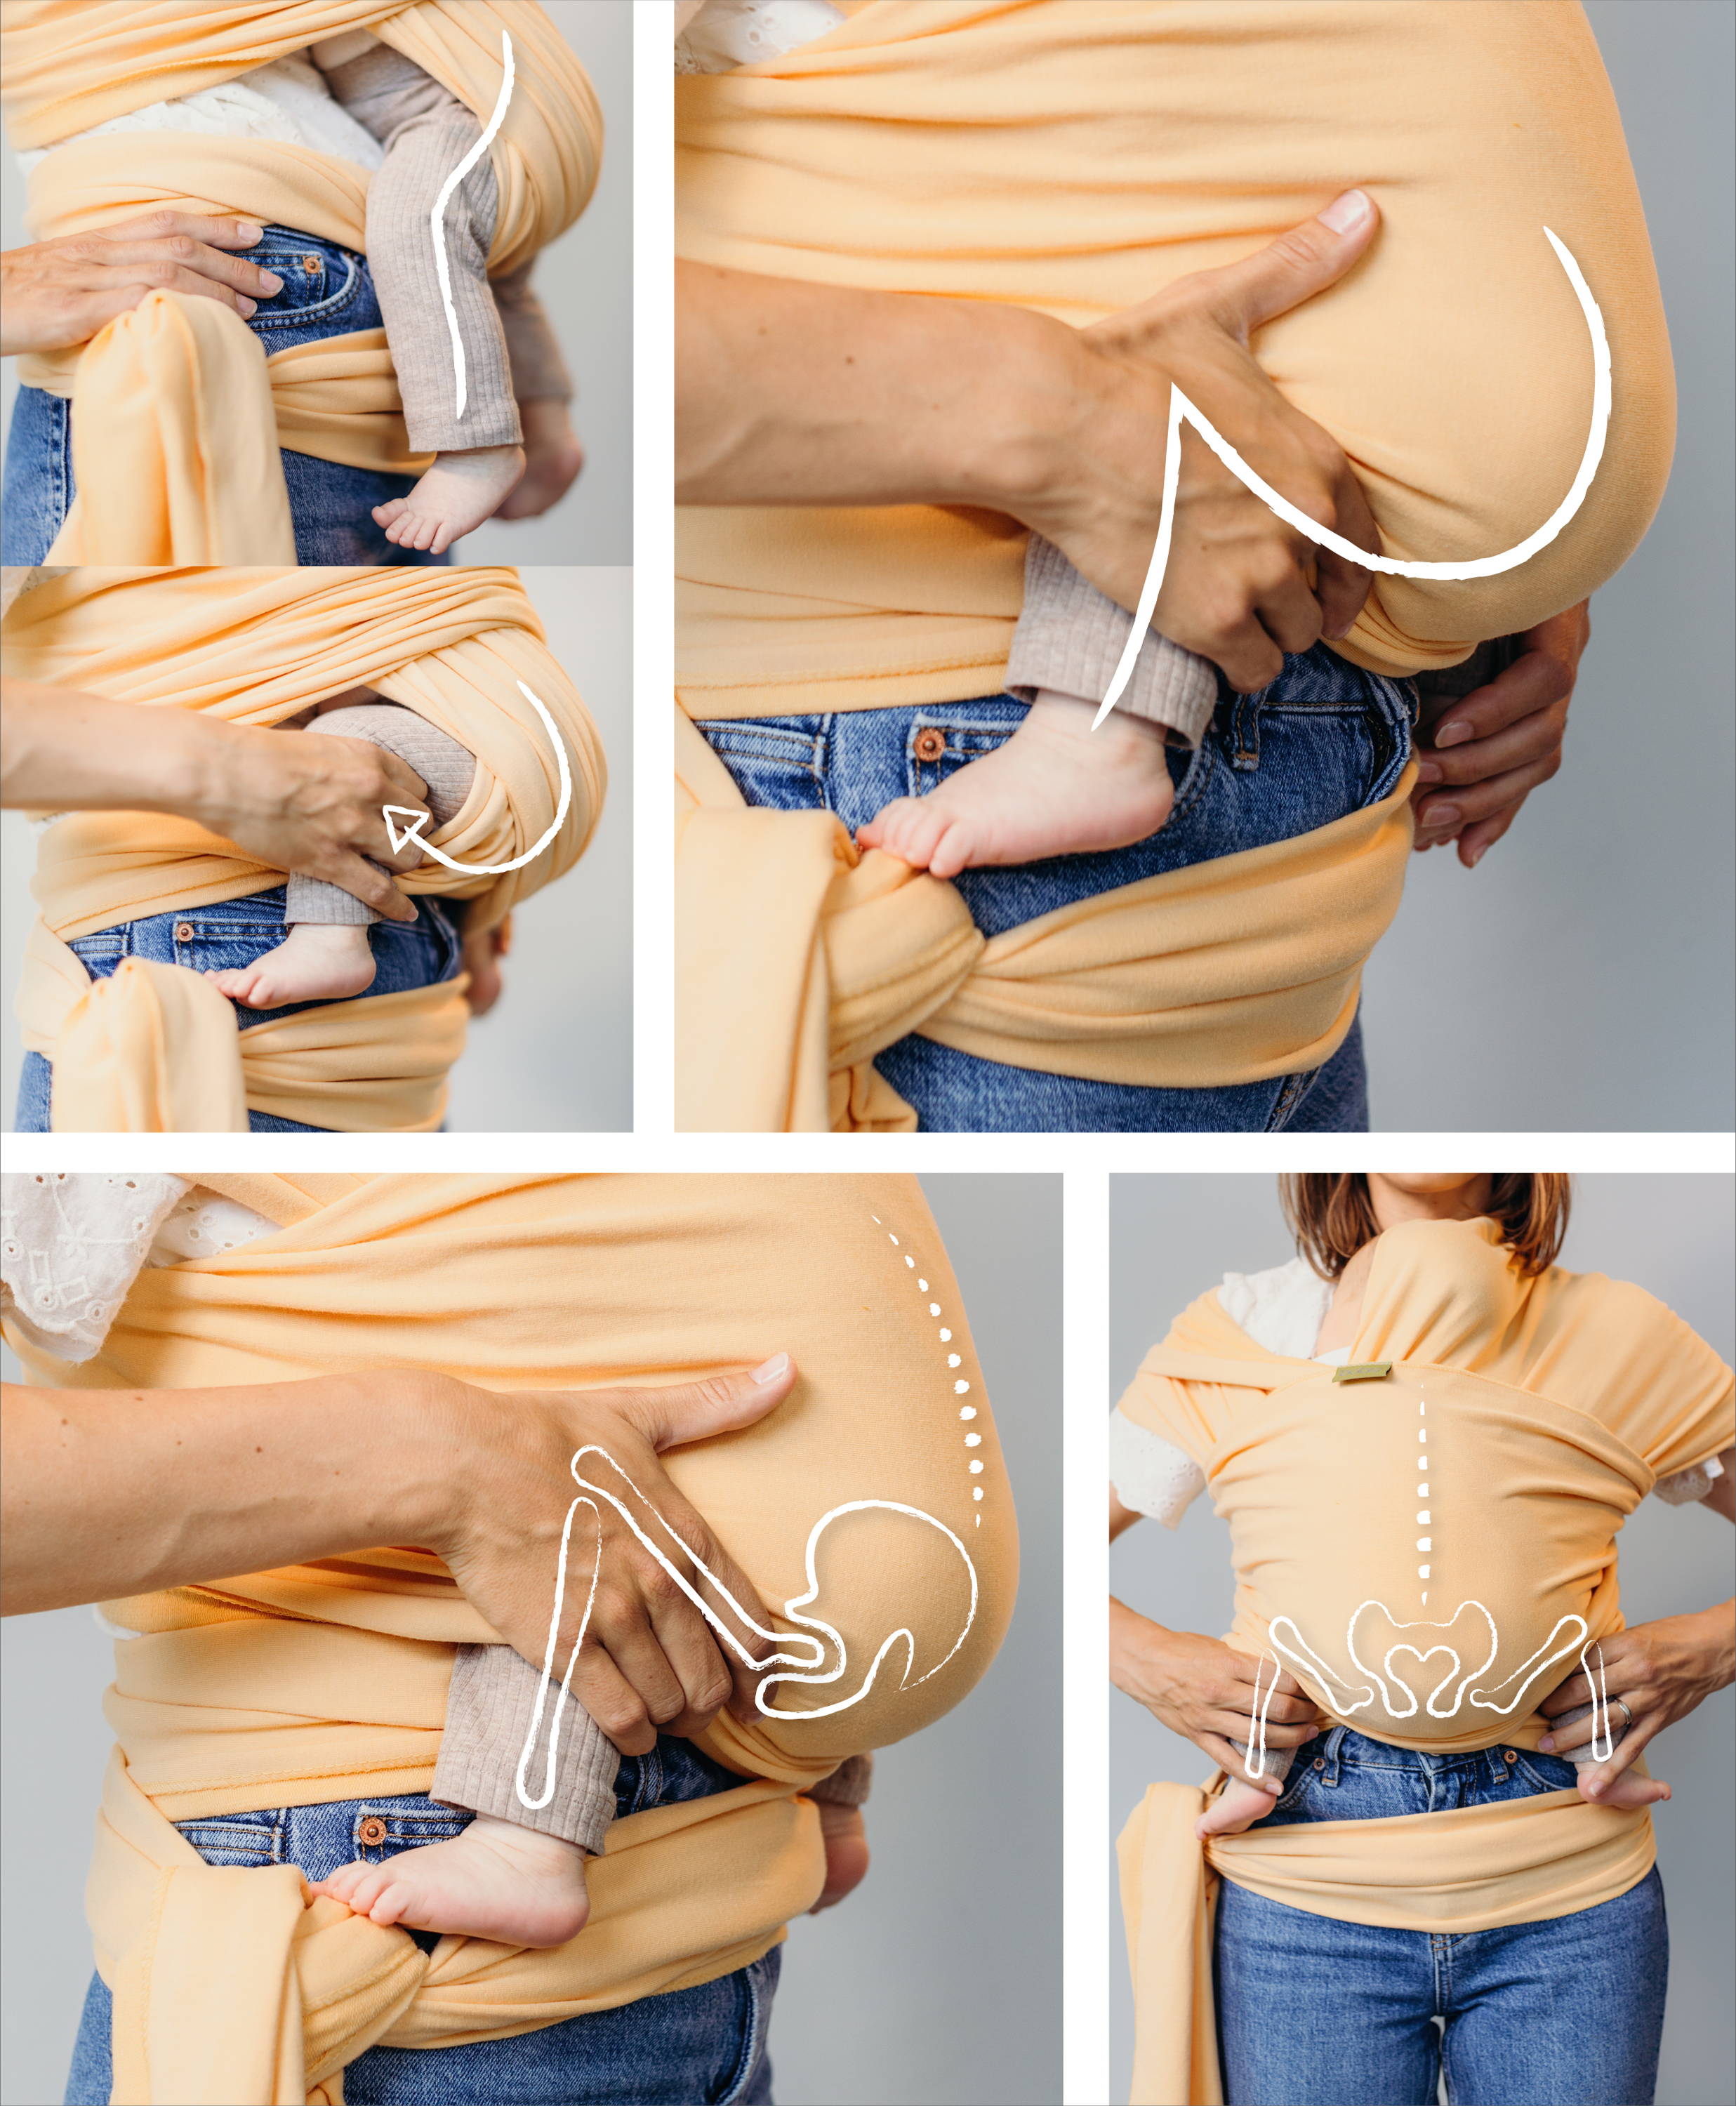
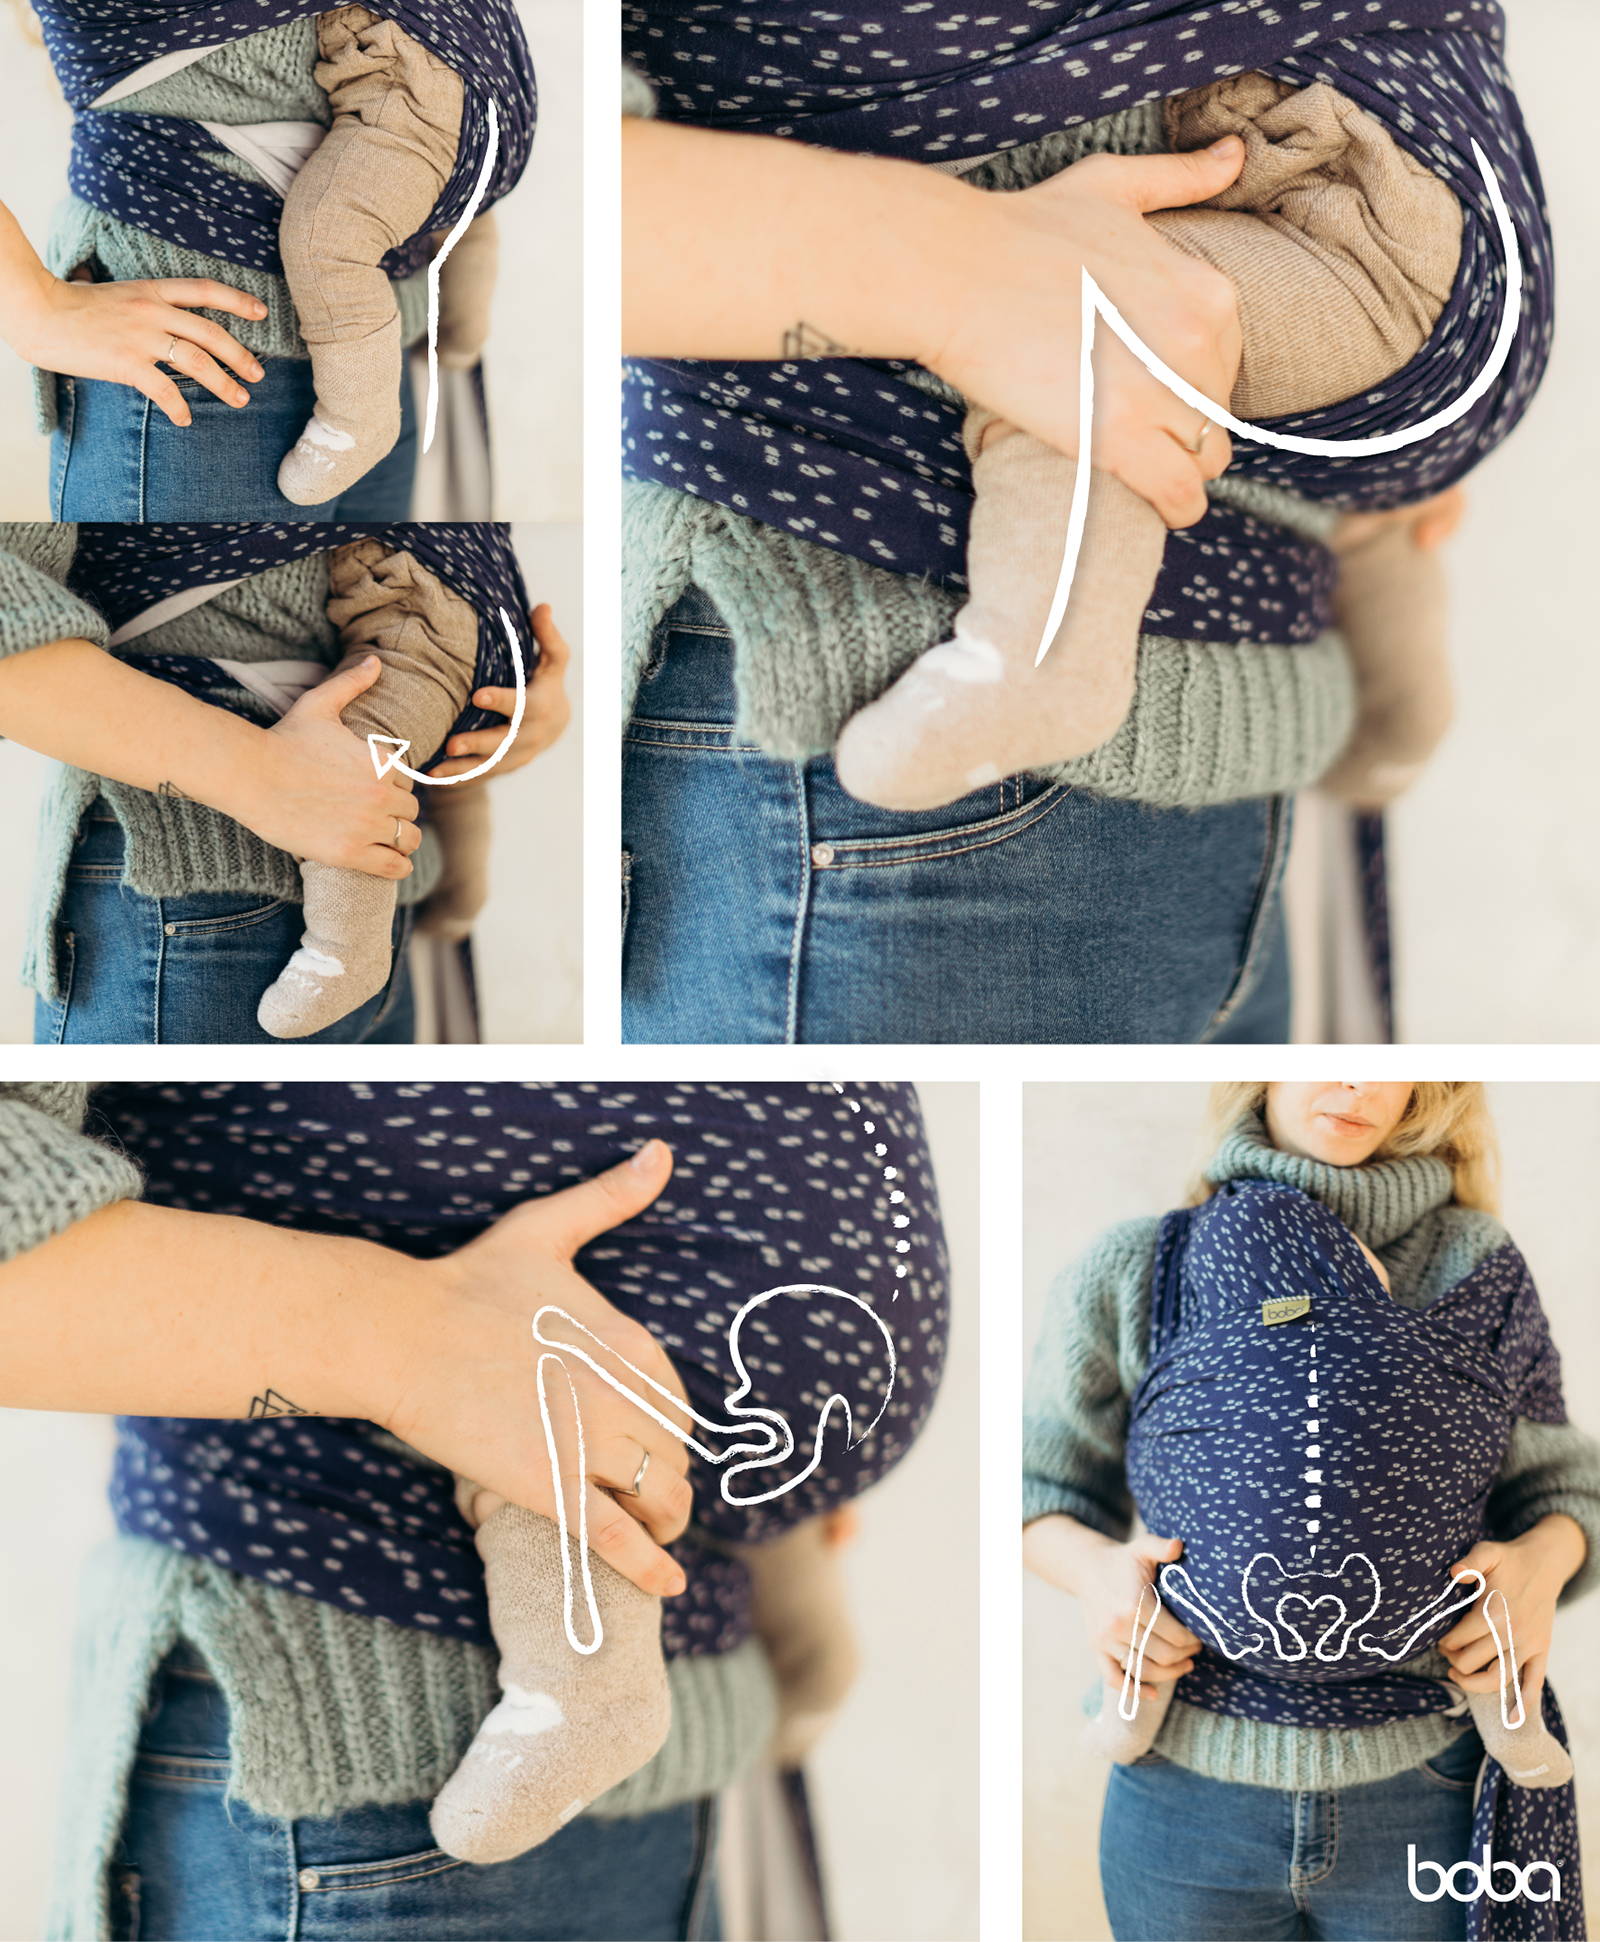
How to do a Pelvic Tuck
- Hold your baby’s legs under their knee pits and gently scoop them towards your body in an upwards motion.
- You are aiming to scoop their bottom under, so the tailbone is the lowest point in the carrier, not the crotch.
- Make sure your baby is supported with the wrap or carrier from knee pit to knee pit and across their back up to their necks!
- Please note - All babies are different, and some will naturally spread their legs more widely than others. NEVER force your baby’s legs to move into a position that does not come easily.


Videos from Dr Rosie Knowles at Carrying Matters:
Video from Roamy Hunt, Babywearing Educator
Learn more about this topic:
What is the Pelvic Tuck or Scoop, Dr Rose Knowles - click here
What's Pelvic Tuck, from the Boba website - click here
